Static Hosting with AWS
This site is hosted from an AWS S3 bucket and fronted by the AWS CloudFront CDN service. Continuing a recent theme about security, I figured I’d provide an updated guide to configuring S3 and CloudFront hosting with the additional angle of securing with TLS.
I briefly covered CDNs and CloudFront in easy wins for website performance. Essentially a CDN is a vast collection of servers distributed throughout the world in a way that they’re “close” to the consumers of the assets served. Most commonly this is done to save on latency of sending images/html/etc all the way around the world.
In this guide I’ll use my little play domain easyas.info to demonstrate. For the most part the AWS CLI client is a readily accessible way to do most things on AWS, but sometimes it’s just easier to drop into the web console, so I do a bit of both.
Hosting from a bucket [S3]
Create a bucket:
aws --region us-east-1 s3 mb s3://easyas.infoConfigure the bucket for website serving:
aws --region us-east-1 s3 website s3://easyas.info/ --index-document index.htmlI’ve not bothered at this point, but you could also specify an –error-document property at this point too, to serve up to the user if they have a bad URL or some other HTTP 4xx error code.
Next, add a bucket policy to allow visitors to view the site:
aws --region us-east-1 s3api put-bucket-policy --bucket easyas.info --policy file://easyas.info.policyHere, the easyas.info.policy file contains:
{
	"Version": "2012-10-17",
	"Statement": [
		{
			"Sid": "PublicReadForGetBucketObjects",
			"Effect": "Allow",
			"Principal": "*",
			"Action": "s3:GetObject",
			"Resource": "arn:aws:s3:::easyas.info/*"
		},
		{
			"Sid": "ListBucketObjects",
			"Effect": "Allow",
			"Principal": "*",
			"Action": "s3:ListBucket",
			"Resource": "arn:aws:s3:::easyas.info"
		}
	]
}
There are many, many other options for website hosting on S3, but that is enough to get up and going.
Put something in your bucket, a basic web page to get going, here’s a starter:
<html>
<head><title>Hosted on S3!</title></head>
<body>
<h2>easyas.info</h2>
<ol>
  <li>S3</li>
  <li>Cloudfront</li>
  <li>Route53</li>
  <li>ACM</li>
</ol>
</body>
</html>
Throw that up into the bucket with something like this:
aws --region us-east-1 s3 cp index.html s3://easyas.info/index.htmlOver in the AWS console, find your bucket and drill down to the Static Website Hosting > Enable website hosting section and put this XML in the <RoutingRules>
<RoutingRule>
<Condition>
<KeyPrefixEquals>/</KeyPrefixEquals>
</Condition>
<Redirect>
<ReplaceKeyPrefixWith>/index.html</ReplaceKeyPrefixWith>
</Redirect>
</RoutingRule>
</RoutingRules>
This will ensure that if you’ve got sub-directories with index.html documents, they’ll be served up when you just have the directory name in the URL, thus https://easyas.info/about will work just as good as https://easyas.info/about/index.html.
Configuring a CDN [CloudFront]
Creating a CloudFront distribution requires quite a few configuration items, but most of them can just be left as default.
From the main screen of CloudFront, click the Create Distribution button.

For the delivery method, we want to choose Web, so click the relevant Get Started button.
For the Origin Settings, in the Origin Domain Name box, choose your S3 bucket from the drop down (click in the text box). But don’t leave it as that, you’ll want to change the URL for the Origin Name and Path to be the full S3 Website Hosting URL, i.e. easyas.info.s3-website-us-east-1.amazonaws.com (rather than easyas.info.s3.amazonaws.com), doing this enables more detailed configuration that you’ll need for website hosting.
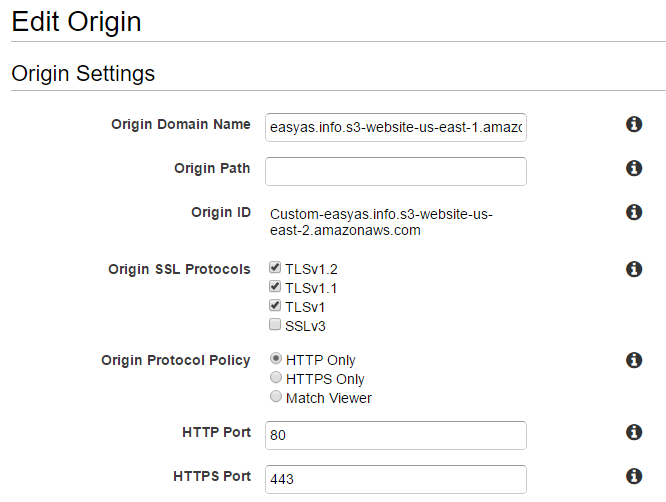
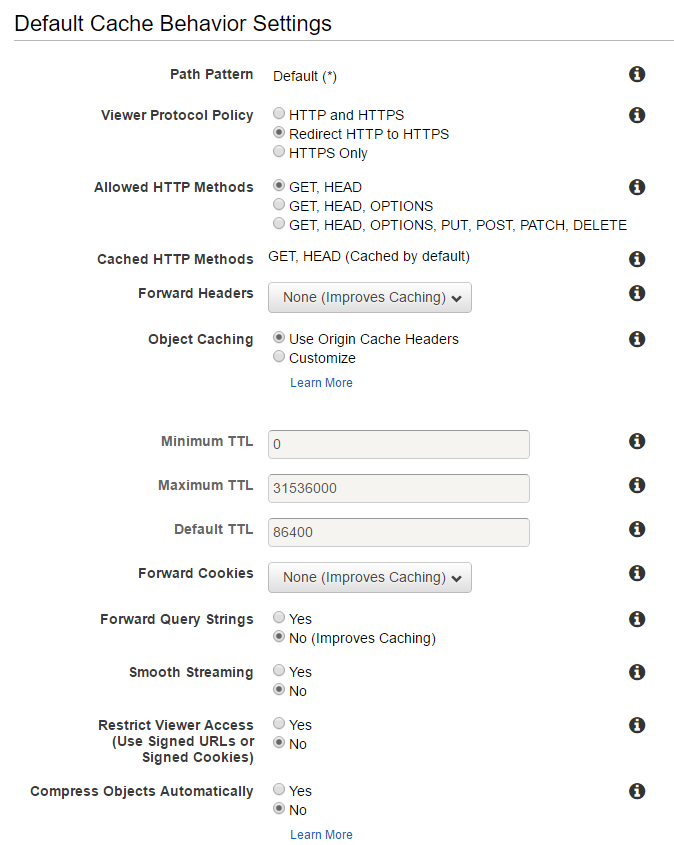
For the Default Cache Behaviour Settings you could pretty much leave it as default, except perhaps change it to Redirect HTTP to HTTPS. It’s easy enough to come back in and tweak these settings at any point in the future so don’t dwell on the specific options.
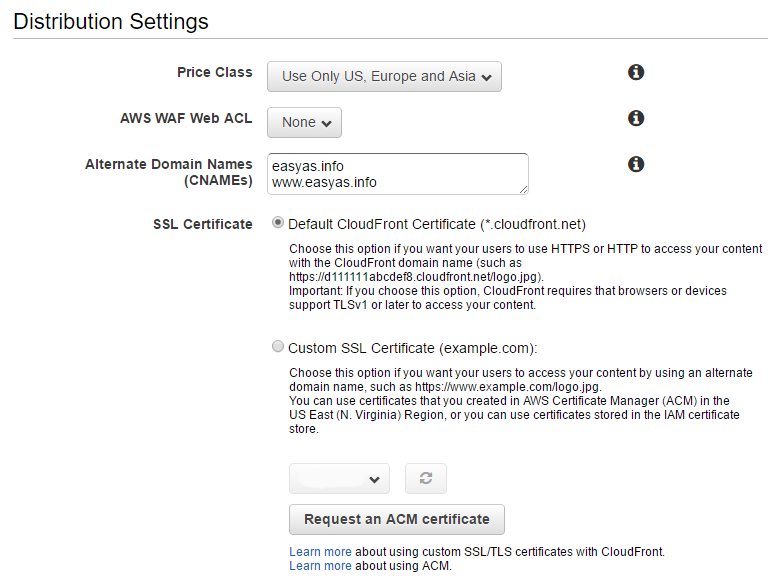
Continuing down, Price Class, I chose Use only US, Europe and Asia but you may choose to vary this (if you’re huge in Brazil perhaps) :)
Alternate Domain Names (CNAMES), here you want to put your desirable domain names that your site visitors will type in, so for easyas.info it’ll be both easyas.info and www.easyas.info.
SSL Certificate, for now just leave it as the Default CloudFront Certificate, we’ll revisit this in a little while.
So that’s basically it for CloudFront, click the Create Distribution button to finish. Take note of the Domain Name for the Distribution in the list to use in the next step. The distribution creation will likely take up to 15 minutes.

Configure a domain name [Route53]
So up to this point we’ve created our bucket and configured the CloudFront distribution but we need to actually point those CNAMEs from the previous step at the distribution. For that, we need Route53.
Without a domain name, you’ll have to use the bucket address, similar to this: http://easyas.info.s3-website-us-east-1.amazonaws.com/ or the CloudFront distribution: https://d1u0vlids9dn5r.cloudfront.net, neither of which are exactly memorable :)
Just because we can, returning to our command line, we configure the CNAMEs in Route53.
First, we add a Hosted Zone for our domain: Click the Create Hosted Zone button and simply put in the domain name, i.e. easyas.info.

This could alternatively be done via command line with something like this:
aws route53 create-hosted-zone --name easyas.info --caller-reference 201606024-2308After creation you’re taken into the Hosted Zone which allows us to Configure the DNS entries, so hit the Create Record Set button. I’ve used www.easyas.info for the name, create an A - IPv4 Address, with Alias = yes, and the Alias Target set to the Domain Name from the CloudFront Distribution i.e. d1u0vlids9dn5r.cloudfront.net, which you can choose from the dropdown.
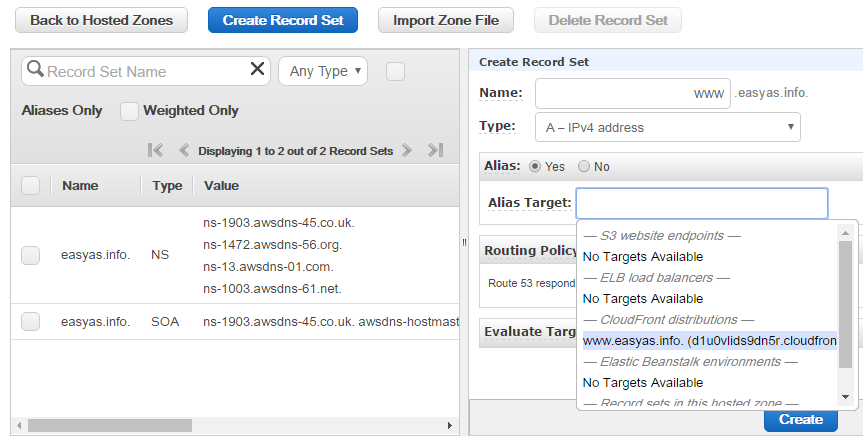
The click Create.
Create another entry with no www in the name i.e. just easyas.info.
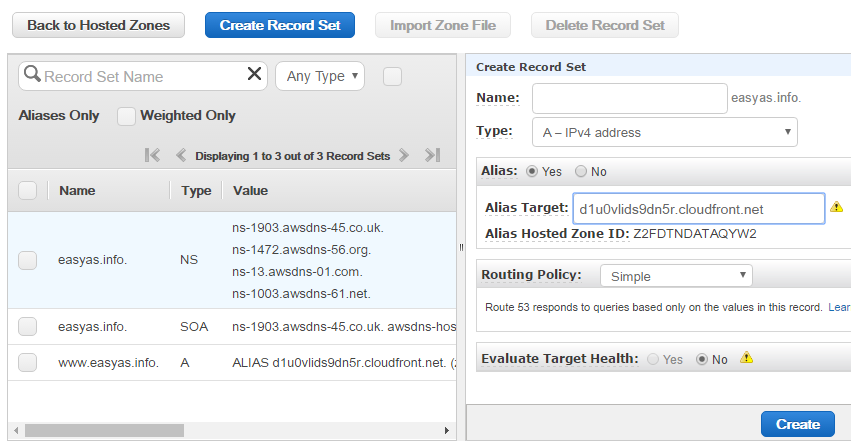
And that’s it! The DNS will take a while to propagate depending on your ISP or other random acts of DNS, but once it does you’ll be able to hit your site with a nice and simple domain.
Adding a real TLS certificate to finish off [ACM]
Whilst the TLS certificate served up by CloudFront is a valid certificate, it will likely prompt some browser warnings (Chrome might even say the world is going to end) as the host names don’t match. What we really need is our own certificate for our domain, with AWS Certificate Manager (ACM) this is both easy and free.
Go back into your CloudFront distribution and edit it. In the SSL Certificate section, choose the Custom SSL Certificate option this time. The hit the Request an ACM certificate button.
This launches a short wizard in a new page. First off, just put in the domain name with and without the www.
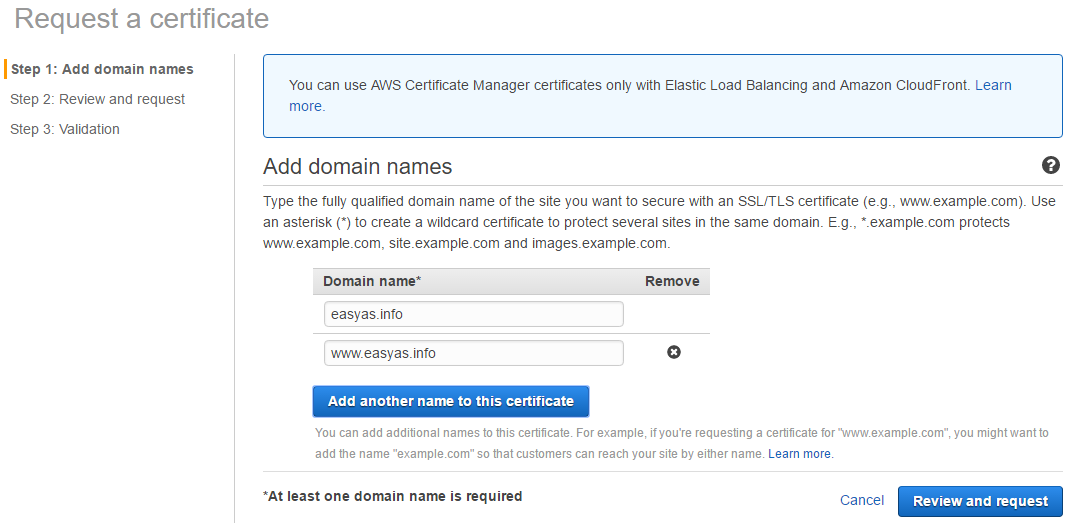
You could also put in other domains that you might want to use on this certificate. Click the Review and request button.
On the second step, confirm you’ve entered your domain(s) correctly then hit Confirm and request.

One the third and final screen you’re informed that a whole pile of email addresses have been sent an email requiring the domain(s) to be validated. Typically, there will be an address that should be accessible by you.
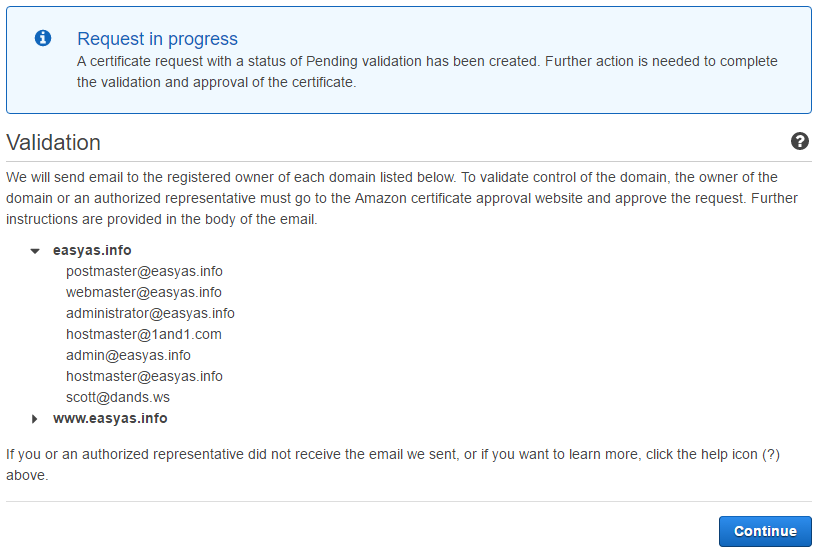
Importantly, you need to approve all of these domain(s), so in my case I’ve received two emails (for both www.easyas.info AND easyas.info) and clicked on the link in both of them.
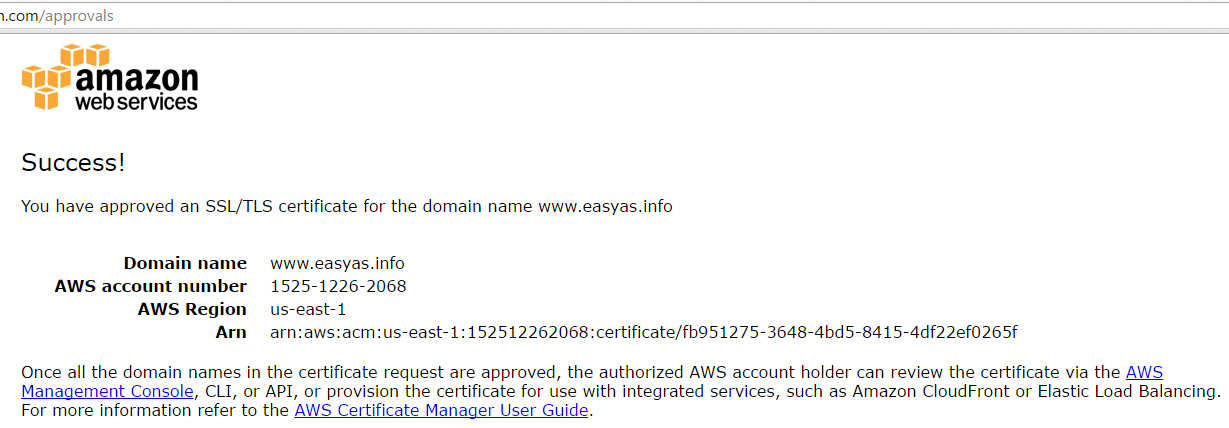
In the ACM management screen you’ll now have an issued certificate.

This leaves us with just one last step, choosing the certificate in the CloudFront distribution. Find the other browser window for your CloudFront distribution and hit the little refresh button, in the dropdown you’ll now have your new certificate.
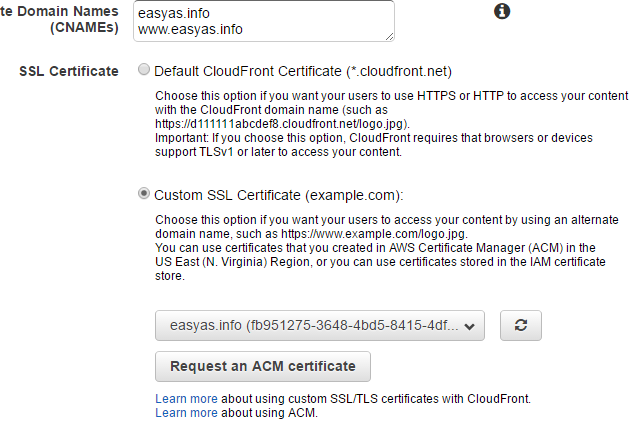
Hit the Yes, Edit button at the bottom, and you’re done! The CloudFront distribution will be redeployed again, that’s another 15 minute or so wait, but once done you’ll be able to check your site and see the new certificate in use.
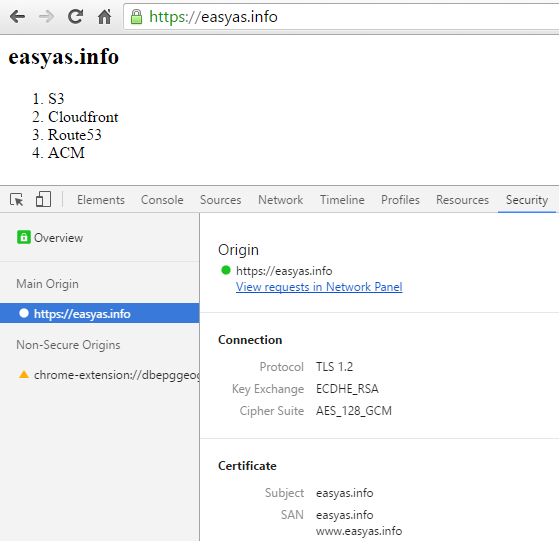
So in summary we’ve:
- made an S3 bucket and put a simple page in there
- created the CloudFront distribution
- pointed a domain at the distribution for an incredibly easy way to host a static website, https://easyas.info
- created a real TLS certificate with ACM to make it all legit.
A note on pricing, the cost of using these services is almost non-existent with the S3 bucket and the CloudFront distribution costing a few cents per 1000s of requests, ACM is free.